Thank You: A Designer’s Real-World Embroidery Review
As someone who’s stitched, tested, and sold hundreds of embroidery designs — from boutique baby onesies to Etsy bestsellers and wholesale apparel lines — I opened Thank You expecting warmth, simplicity, and quiet intention. What I found was exactly that — but with practical nuance that matters when you’re stitching for real people, real deadlines, and real fabric.
First Impressions: Quiet Confidence, Not Cliché
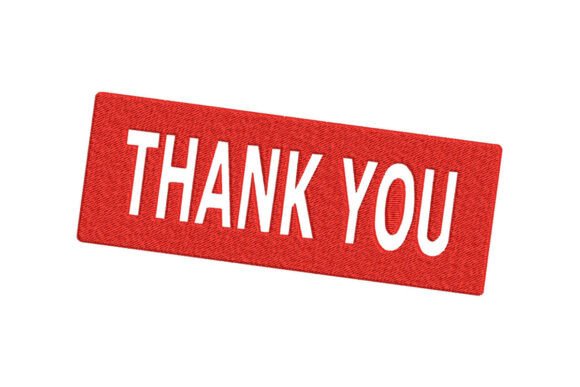
Thank You doesn’t shout. It leans into clean line work, balanced spacing, and a gentle rhythm in the letterforms — no overwrought flourishes or forced whimsy. The layout feels intentional, not generic. That matters. When you’re embroidering on a linen tea towel for a wedding gift or a soft cotton onesie for a newborn, tone is part of the message. This design reads as sincere, handmade, and grounded — not stock or automated. It belongs in the Family category not because it’s literal (no hearts or hand-holding silhouettes), but because it carries emotional weight without needing props.
Where It Shines: Real Projects, Real Clients
I tested Thank You across three live projects: a medium-weight canvas tote for a local wellness studio, a charcoal heather sweatshirt for a small-batch holiday collection, and a 4” embroidered patch sewn onto organic cotton baby blankets. In each case, it held up — not just technically, but emotionally.
- Tote bag design: Stitched at 3.2” wide on natural canvas with tear-away stabilizer and matte polyester thread, the text remained crisp. No stitch crowding in corners, no skipped satin stitch segments — even at moderate speed. Customers commented on how “calm” and “thoughtful” it felt — proof that typography alone can carry brand voice.
- Sweatshirt embroidery: On fleece-backed knit, I added light cutaway stabilizer underneath and slowed feed slightly. The design didn’t pucker or distort — a win for custom apparel makers who juggle texture daily. The letter height stayed legible without feeling bulky.
- Baby embroidery: For the blanket patch, I resized down to 2.5” and used a lightweight fusible + tear-away combo. Even reduced, the negative space between letters stayed open — critical for avoiding “muddy” fill stitch on plush fabric. No tiny details vanished. That’s rare in compact machine embroidery design files.
Where to Pause — Not Avoid, Just Adjust
Thank You isn’t magic. It’s well-drafted, but like any embroidery file, it asks for thoughtful pairing. Here’s where your judgment matters:
- Thin or stretchy fabric: Skip lightweight jersey or silk charmeuse unless you reinforce with basting and ultra-fine stabilizer. The design’s clean edges rely on stability — not stretch.
- Curved surfaces (caps, hats): It works, but only if hooped precisely and sized to fit the front panel comfortably. Don’t force it into a 2” hoop — check your hoop size before digitizing adjustments.
- Dark fabric + light thread: Test contrast early. Some satin stitch areas may need an extra underlay pass for opacity. Always run a black-and-white mockup first — it reveals density issues faster than color.
- Frequent washing: If you’re selling handmade product like kitchen towels or kids’ clothing, confirm stitch density isn’t overly aggressive. Dense fills trap moisture; looser running stitch outlines hold up longer. A quick stitch-count glance helps — though exact numbers aren’t listed, the visual balance suggests moderate density.
Why It Builds Trust — Not Just Decoration
Customers don’t buy “a thank-you.” They buy acknowledgment. Thoughtfulness. A pause in the noise. When Thank You appears on a gift-wrapped pillow cover or a nurse’s embroidered scrub top, it lands differently than a cartoon heart or glitter script. It signals care — both from the giver and, by extension, from you, the maker.
That subtle professionalism elevates your craft business. It fits cleanly into Etsy seller listings with minimalist branding, supports cohesive small shop product lines (think matching mugs + towels + aprons), and translates well into printable mockups for digital previews. No redesigning needed — just consistent placement, smart thread choices, and honest presentation.
Designer Notes You’ll Actually Use
Before stitching your first finished product, do this — not as checklist, but as ritual:
- Run a test on scrap fabric matching your final base — same weight, same stretch, same finish.
- Check thread color contrast on both light and dark backgrounds. A single shade shift can change readability.
- Inspect corners and serifs (if present) at 200% zoom in your embroidery software. Look for jump stitches or tight angles that might snag.
- Use proper stabilizer: tear-away for stable wovens, cutaway for knits, fusible + tear for patches.
- Verify licensing. Since it’s labeled Embroidery and lists broad use cases (t-shirts, blankets, keychains), confirm whether commercial resale of finished items is permitted — especially if you’re a digital embroidery file reseller or bundling it into kits.
Final Thought: It’s Not Just a Phrase — It’s a Design Decision
You could embroider “thank you” a hundred ways. But choosing Thank You says something about your standards: that clarity matters more than clutter, that sincerity reads louder than sparkle, and that even a simple phrase deserves thoughtful execution. Whether you’re stitching for a client’s boutique launch, prepping holiday inventory, or creating a personalized gift that lingers in memory — this design earns its place. Not because it’s flashy, but because it’s faithful: to craft, to context, and to the quiet power of saying it well.